
How to update bathroom tiles


Knowing how to update bathroom tiles without replacing them is a useful hack for any homeowner.
According to experts, we should renovate our bathroom every 7-10 years (though many last much longer). This is a long time to live with the same look and is bound to result in a lot of wear and tear.
The good news is, you don’t have to go down the expensive route of replacing your entire bathroom if you want to keep the space feeling fresh. A bathroom tile makeover is a quick and cost-efficient way to give your sanctuary the spruce up it deserves.
In this article, we’ll share some tips on how to revamp bathroom tiles. We’ll also explore the options and products available to help you and answer a few common questions too.
How can I update my bathroom tiles without replacing them?
There are lots of different ways to refresh tired tiling in your bathroom without going through the painful process of tile removal. The option you choose may depend on:
- your budget;
- your timescales;
- your DIY skills;
- the look and feel you want to create; and
- the space and surfaces you’re working with.
Let’s explore a few of these options.
1. Repairing chips
If your bathroom has a timeless white tile design but has seen a lot of wear and tear over the years, repairing chips can be a great way to give it a new lease of life.
Our Kitchen & Bathroom Repair Kit can be used on interior tiling, as well as baths, sinks and appliances. It contains everything you need to get the job done including a small applicator, foil pack of hardener, a tube of filler and a bottle of touch-up enamel.
2. Removing grout stains
If you’re happy with your tile design but it’s time for a tidy up, try treating your grout with a dedicated cleaner.
Removing stains caused by mould and limescale can breathe new life into your bathroom grout and it needn’t take a lot of elbow grease. Whilst grout stains can be tough to remove, products like Ronseal Grout Cleaner are stronger than bleach and come with an equally tough brush to make the job easier.
3. Painting over your tiles
If you like the style, shape and position of your tiles but dislike the colour or design, why not paint over them? It’s easy to do yourself, it recycles your old tiles and it’ll save you time and cash too.
Our One Coat Tile Paint range is available in 8 colours, from Granite Grey to Ivory. So, whether you want to tone down your tiles or make them the star attraction, you’ll have plenty of hues to choose from. The paint is also touch dry in one hour, and brushes can be washed with warm, soapy water.
4. Re-defining your grouting
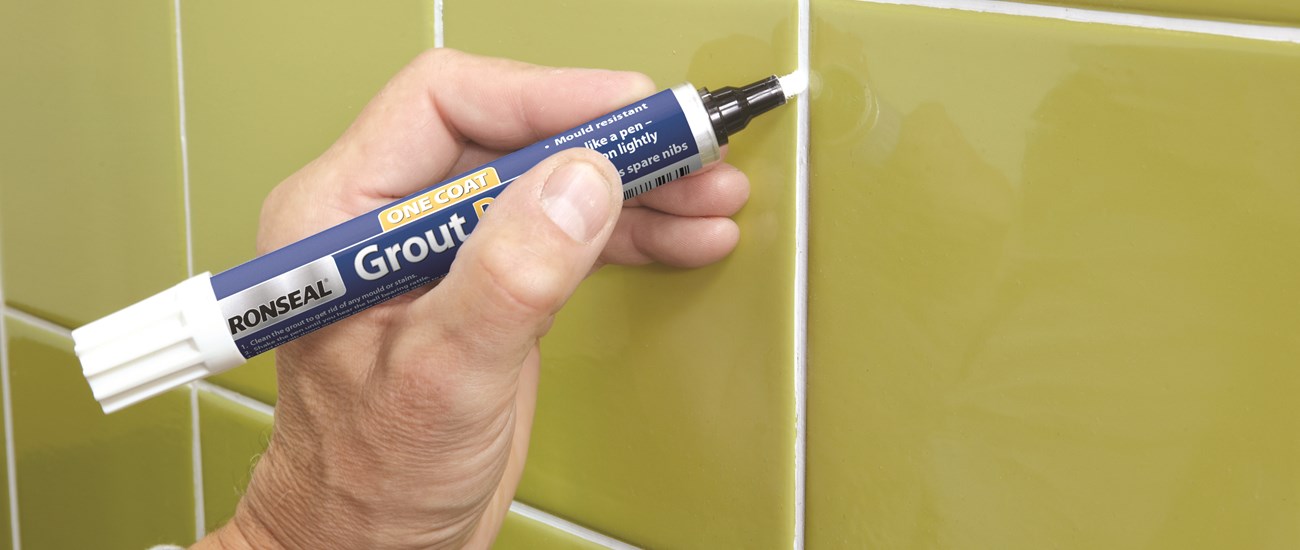
Redefining your grout lines using our Grout Pen is a quick and satisfying way to refresh your bathroom surfaces. It’s also a recommended step after painting your tiles, to ensure your grout lines stay ship-shape.
Our grout pen is suitable for enamel, porcelain, fibreglass and ceramic tiles. Not only does it take just one coat, but it is also waterproof and mould resistant so you can protect and perfect in one handy step.
5. Delving into design
You don’t have to completely paint over your tiles to give them a facelift. Try decorating your tiles using a stencil design and paint to bring in a theme or pattern. You can also elongate or zone out a space by painting only key sections in a specific shade.
6. Covering up completely
If you want a more dramatic change of direction without having to remove tiles, you can cover them completely. From a second layer of tiles to waterproof wall panels, there are numerous options available. Just be sure to consider the extra depth this layering will add.

How do I paint bathroom tiles?
The below instructions summarise the main steps in the process for painting bathroom tiles with Ronseal One Coat Tile Paint. However, do check the manufacturer’s guidelines on any specific product you’re using to ensure the best results.
Before you start
- Clean surrounding grout lines with a grout cleaner and wipe with a lint-free cloth.
- Repair any damaged areas of grout.
- Give your tiles a thorough clean with bleach and wipe them down.
- Open your doors and windows for added ventilation.
Application
- Thoroughly stir the paint before you apply it. This helps to ensure the colour pigments are properly mixed.
- Apply one coat of the paint working it into the grout line. Finish each tile with a vertical stroke.
- Wait 24 hours for the paint to dry.
- If you are painting with a significantly different colour, you may need to apply a second coat to make sure that it’s properly covered.
- After 24 hours, redefine the grout line with a grout pen.
Aftercare
- Your brushes can be cleaned with white spirit or brush cleaner.
- Once the paint has dried, you can clean your tiles as normal. Don’t worry about scrubbing too hard, the paint is highly durable and can stand up to cleaning.
FAQs
Can you paint over tiles in a bathroom?
Yes, as long as you have a specialist paint such as our One Coat Tile Paint, you can paint over your bathroom tiles. Our product treats all interior tiles and it leaves your treated surface waterproof and mould resistant.
How much paint will I need?
This depends on the product you use and the size of the space. If you opt for a paint like our One Coat Tile Paint, you’ll only need to treat most areas once, which saves on product. Use our coverage calculator with your tile area measurements to work out how many tins of paint you’ll need.
Can I paint over existing tile paint?
Yes, but again, this will come down to the product you choose. Ronseal’s One Coat Tile Paint will allow you to treat painted tiles and it can be used without a primer too.
How long does tile paint need to dry?
Ronseal’s One Coat Tile Paint takes 24 hours to dry and become waterproof after the first application. However, other paints you use may well be different so do check the product’s directions.
Whether you’re looking to refresh your bathroom on a budget or pack some personality into a property, revamping your bathroom tiles is a great place to start. If, however, you want to replace your tiles altogether, do check out our guide on how to tile a bathroom.
How to guides
Easy to follow steps to help you do a professional job on any DIY project.


