
Bathroom tiling patterns explained
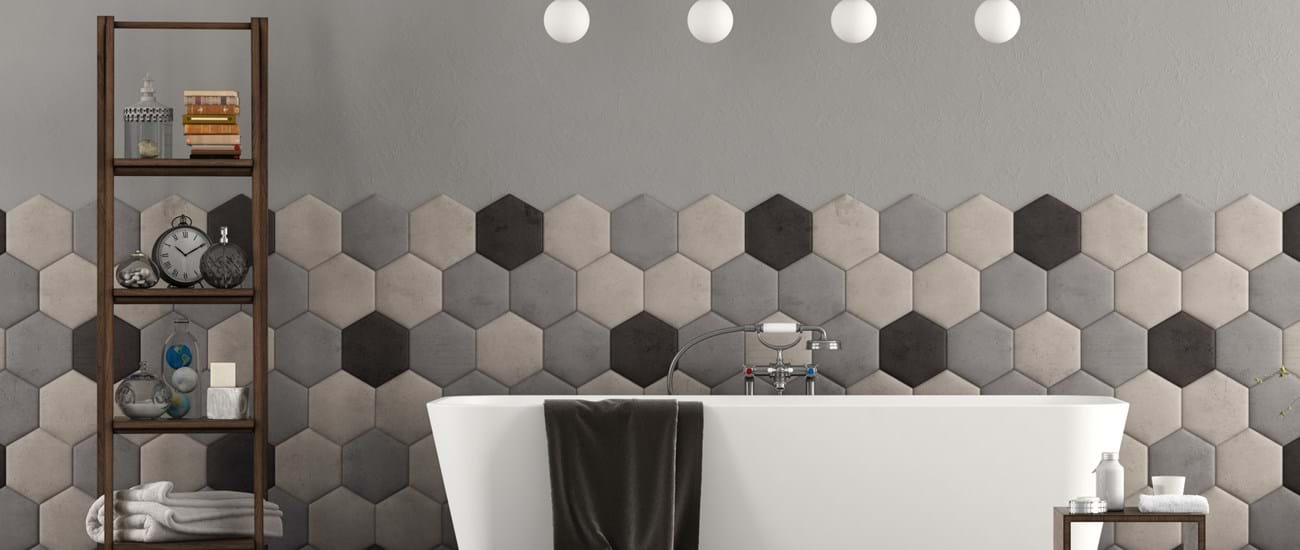
Tiles are great for hardwearing areas of your home like your bathroom. They’re waterproof, robust, and available in a range of sizes and styles to suit your personal preference.
When choosing a tile design, there’s a lot to consider and it can be tempting to focus on the colour or finish of the tile at first. However, it’s well worth exploring a variety of bathroom tiling patterns before you make any decisions.
From brick bond to basket weave, there are lots of tile layout patterns to pick from. Each one has the ability to transform not just the tile itself, but the room you’re styling too. So, it’s best to have your tile positioning in mind from the outset. That way you can narrow down your search and pick the product most suited to your overall design.
Tile layout patterns
Whilst it may not seem like a major decision ahead of the job, the way you arrange your tiles can truly change the way they fit and feel in a design. So, the earlier you can decide on your tile layout pattern the better.
Each pattern can provide a range of effects and benefits, including:
- adding interest or creating calm in an otherwise busy area
- creating a more traditional or modern feel
- visually enhancing or interrupting the dimension of your room
- complementing or contrasting with other features to create balance
Here we explore 10 popular tiling options from the many available.
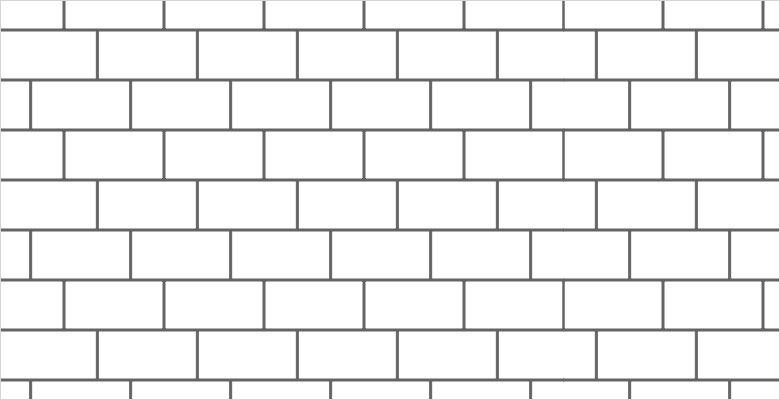
1. Brick bond (50:50 offset)

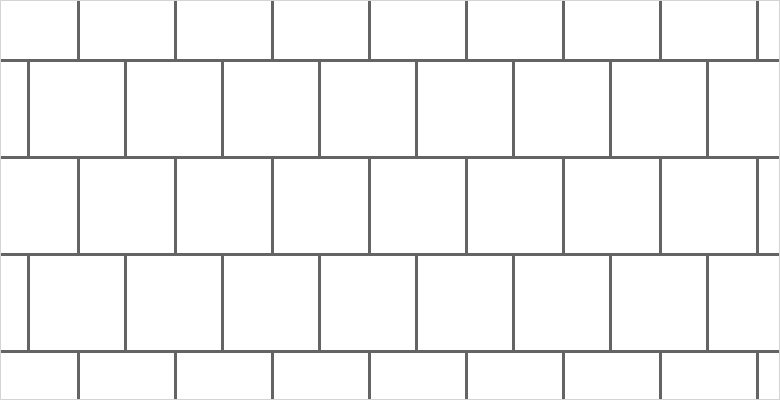
Brick bond, also known as running bond, is a classic tile layout pattern from the Victorian era. It can be used to create a more timeless feel in a bathroom and is often seen on walls and backsplashes.
For a traditional take on this pattern, the tiles need to be rectangular, and the height should be at least half the width of the tile when it’s laid horizontally. Most people will opt for a metro shaped tile (also known as subway). However, you can also use square tiles should you wish to deliver a more contemporary and compressed look.
Whatever shape you go for, you need to offset each tile by 50% so that the end of the tile on the row above sits halfway across the tile you’ve just laid.
Top tip: using a contrasting grout colour will help bring out a brick bond pattern as and create more of a feature.
2. Staggered brick bond (70:30 offset)
If you’re looking to create a more modern look with your metro tiles, you can use the staggered brick bond tile pattern. Clean and contemporary, it puts an unexpected twist on the traditional tile placement. It can also help your room appear wider too.
For this look, the vertical edge of the tile you’re laying should sit about one third into the brick below it.
Top tip: offsetting your grout lines in a layout like this can help hide imperfections if the wall you’re tiling is uneven.
3. Stepladder (Vertical brick bond)
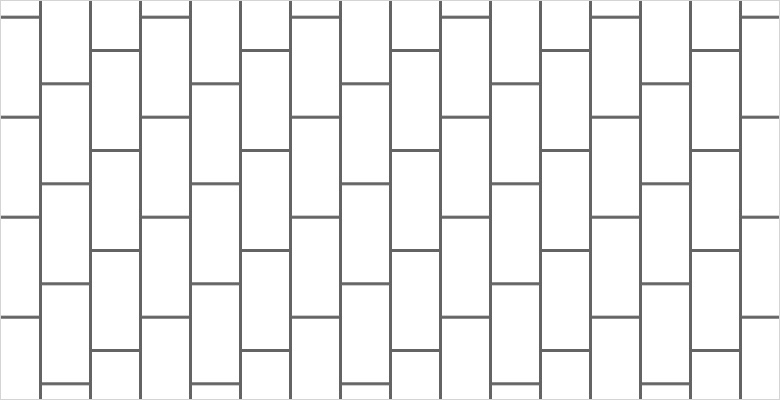
Stepladder is the same as brick bond, but instead of laying tiles horizontally, you lay them vertically.
This pattern is more unexpected than its horizontal counterpart. It also helps to add the illusion of height or length to a room.
Top tip: this pattern can be prone to bowing. So, when working with larger tiles (over 30x60cm), consider a 70:30 staggered ratio rather than a 50:50 style as this can help.
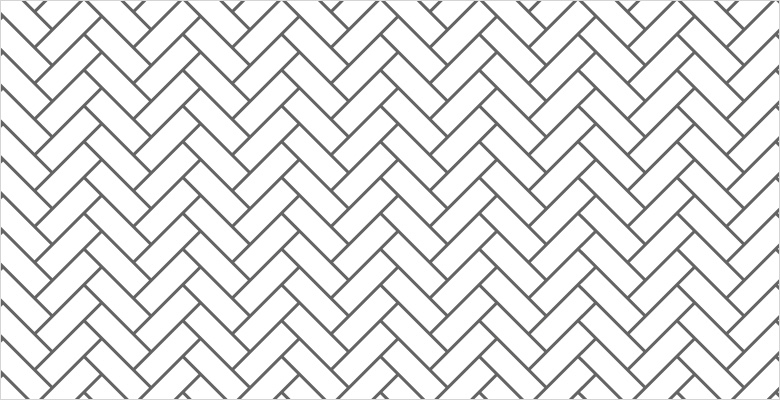
4. Herringbone
In a herringbone pattern, the tiles are laid in an overlapping V shape, and the final effect looks like a zigzag from left to right. With its slightly more intricate, interwoven appearance, a herringbone layout demands more attention than your average pattern and adds texture to your bathroom design.
To achieve this look, you need long and narrow tiles, like metro tiles but thinner.
You can then use a horizontal herringbone to make a room appear wider or a vertical herringbone to give the illusion of height. Block Herringbone will give you a more grounded, graphic look.
Top tip: if you want to update your herringbone tile layout pattern, try a double block finish where you layer pairs of tiles in this style rather than single pieces.
5. Linear (grid or stacked)
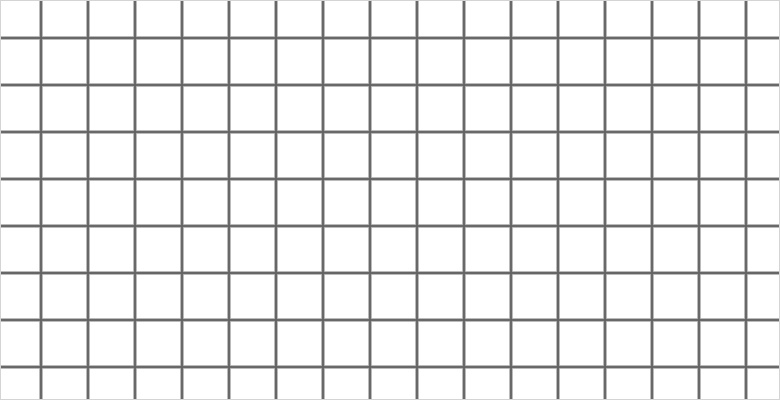
A linear pattern (also known as a grid or stacked layout) is very uniform, with all the tiles aligning perfectly. It works well with square tiles but can also bring a modern twist to subway tiles with the added option to stack horizontally or vertically depending on your space.
It’s also worth noting that linear tiling patterns can result in less waste as you don’t have as many odd ends to try and place.
Top tip: if you’re looking to bring a textured tile into your space, a linear or stacked design will help balance it. It will also be easier to match up the depths in your tile edges and provide a more even finish. This is particularly important in floor tile layout patterns.
6. Hexagon

A hexagon tile layout pattern provides a graphic, geometric finish that’s perfect for
feature walls. It’s also a very versatile shape, working well in modern bathrooms or more traditional designs depending on the style you choose.
If you pick a tile with a pattern on it, you can also personalise your design further by trying out various oscillations and combinations between hexagonal tiles.
Top tip: save time and effort by seeking out hexagonal tiles on prearranged mosaic sheets. This way you get all the impact without having to lay thousands of individual tiles.
7. Basket weave
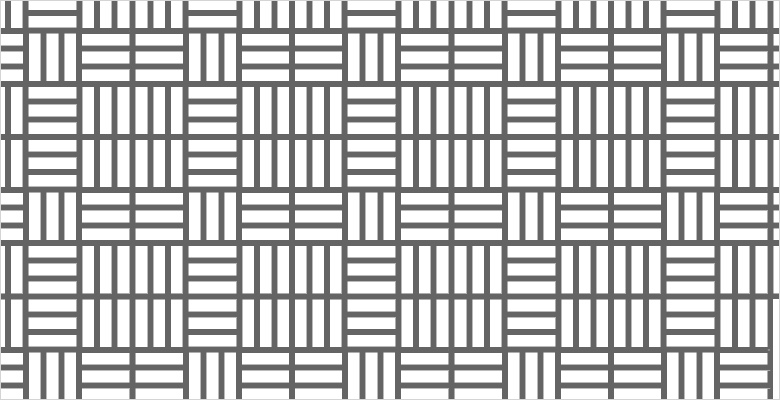
Basket weave is an unusual layout that adds interest and variety to any bathroom. Due to its busy appearance, it’s most effective when used in smaller, confined spaces such as a sink splashback or shower cubicle.
To create this look, you need to group tiles in twos or threes. Lay the tiles stacked vertically and then place the same number horizontally next to the vertical ones. The final look will alternate between vertical and horizontal tiles in a square.
Top tip: this look works best with a thinner grouting area, so you may want to choose a tile with a rectified edge.
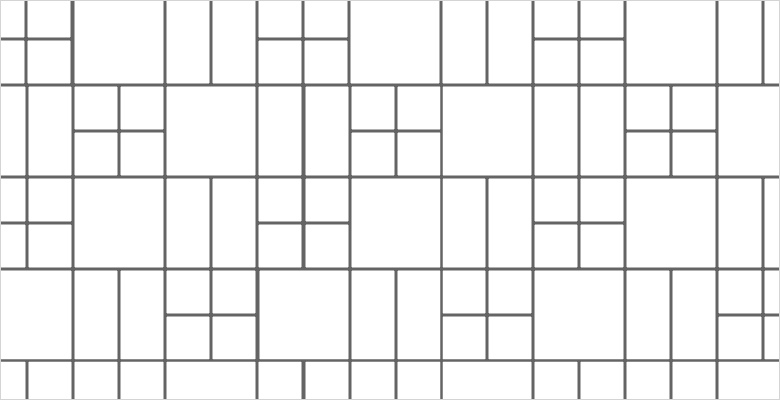
8. Modular
For a modular pattern you need several different sizes of tiles. This layout is a good choice if you’re mixing a variety of design styles in your bathroom or you need to add more interest to a particular area.
There are lots of different ways you can arrange a modular pattern. So, once you have your tiles, try experimenting to find the style you like. When you’ve settled on a layout, repeat it several times until you’ve covered the area.
Top tip: this design works particularly well as a floor tile layout pattern but make sure you have enough space to repeat it several times to achieve the full effect.
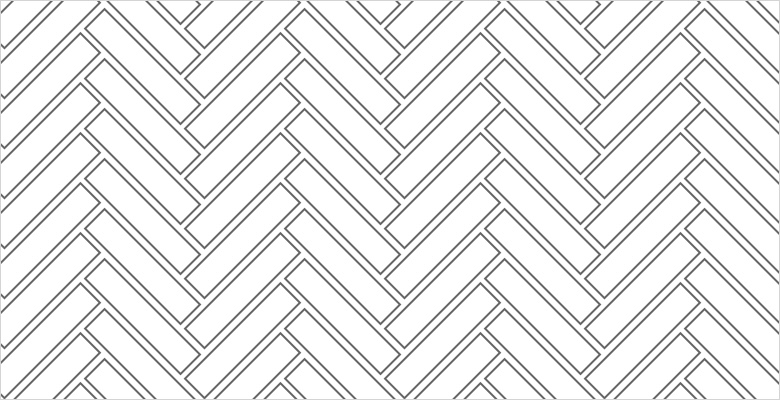
9. Chevron
Chevron patterns are a lot like herringbone, but the narrow ends meet to create a zigzag. It can be used to add a more creative edge to your room or balance out more simple surroundings.
Using contrasting colours in your chevron design will provide an eye-catching and bold look. If you’d prefer something a little more subtle however, you can choose tiles in similar shades to create a shabby-chic style gradient.
Top tip: if you want a chevron pattern, be sure to buy tiles specifically designed for this formation. Otherwise, you’ll have to cut them to size which could be time consuming and wasteful.
10. Creative shapes
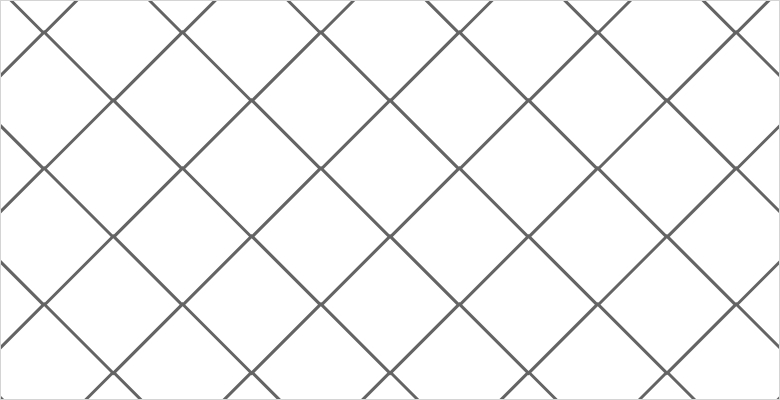
If you’re looking to do something more stand out with your tiling, you can try working with more unusual shapes or configurations.
Developing a diamond layout using square tiles is a great starting point but there are more adventurous options. From Moroccan-inspired fan designs to more intricate rhombus-based chevron and star patterns, the possibilities are endless!
Which type of tile should you choose?
Picking your tile design is another important piece of the design puzzle. And, once again, there are plenty of different options to choose from. Here are a few to consider:
Block colour tiles
For a sleek and simple look that lets your furniture or fittings do the talking, you can opt for a block colour style tile. This look is often achieved with either metro tiles, which are glossy and brick-like, or a natural stone-effect tile that will add texture over colour.
Metro tiles are available in almost any colour you can think of and look good as a splashback or a surround for a bath.
Natural stone tiles
Natural stone finishes like marble, granite or limestone bring texture to a bathroom and can provide a very sophisticated appearance.
Using naturally textured materials also helps add interest to a room without having to use colour. This makes them a great choice if you’re wanting to keep a very subdued, neutral palette.
Mosaic tiles
Mosaic tiles are made up of lots of individual tiles, and add colour, texture and detail into your bathroom design. Whilst most mosaic tiles feature circular, hexagonal, or square pieces, some come in large and unusual shapes like teardrops or fish scales.
With this option, you don’t have to spend hours placing each single tile as they come in sheets that you can lay like an ordinary tile. Many designs also give you the flexibility to create your own patterns and arrangements.
Porcelain and ceramic tiles
Porcelain tiles are available glazed or unglazed and are commonly used to create the effect of natural-looking stone. Porcelain is a hard-wearing material and doesn’t require sealing either, so it’s effortless to lay and easy to upkeep. As a material, porcelain tends to be less porous than ceramic which can make it the preferred choice for bathroom areas.
Ceramic tiles are still a valid option to explore however as they’re often cheaper than porcelain and easier to work with (as they’re less brittle). You can also find more design options available in ceramic tiles.
Encaustic tiles
Encaustic tiles were favoured during the Victorian period. The tiles feature patterns made up of coloured clays moulded together (rather than using glazes to add a design on the surface).
If you’re lucky enough to have a Victorian home, you may have some of the original tiles in your hallway. Nowadays though, you’re more likely to see encaustic-effect, replica tiles used in households. These are more readily available but stay true to the original patterns (such as black and white diamonds or elaborate swirling fleur-de-lis styles).
Terracotta tiles
Terracotta tiles are a classic option that can be used in your bathroom to create a Mediterranean feel. With its warm colour and tactile finish, Terracotta adds a soft richness to any area. As a material, it can be hard to maintain though. So, it may be worth exploring the man-made alternatives if you need a room that’s easier to upkeep.
Glass tiles
Glass tiles can be used in a bathroom to create a high shine, style statement. They’re incredibly resistant to stains but can be prone to chipping and cracking. As such, it’s best to avoid them in high traffic areas or in spots where things may be dropped on them (like below a bathroom cabinet).
Tile size
When picking the right product for your project, it helps to know the advantages and disadvantages for the various size options available.
Smaller tiles:
- Small tiles are a great way to introduce variety to your bathroom, and they give you the chance to be creative with your layout.
- However, in a tighter space, too many small tiles (think mosaic style) can make the room feel busy.
- Laying lots of small tiles can leave more room for errors and be time consuming too.
Larger tiles:
- Large, plain tiles can create a feeling of calm in a room because they offer clean lines and less clutter. They can also help a small bathroom feel bigger by having fewer joining points and distractions.
- The larger the tiles you use, the less you’ll have to lay, but getting the placement right is still very important.
- If you opt for a large, patterned tile it’s best to avoid using it in small spaces that it may overwhelm. This type of design works better in rooms where it has space to make a statement and become a feature.
- Using large tiles can be limiting as they offer less opportunity for you to express your style.
As this article outlines, there are plenty of design decisions to make when taking on a tiling project. And, when it comes to delivering the design of your dreams, a little homework can go a long way. From tile layout patterns to shapes and sizes, seek out the options that will help you achieve your final look and help make the most of your room.
If all this talk of tiling has you itching to get the grout out, check out our handy guide on how to tile a bathroom.


